I previously described my setup for Publishing Obsidian Notes with Quartz, which I setup to run on my home server. However, recent challenges led me to transition to GitHub Pages, and I’d like to share my experience with this migration.
The Self-Hosting Experience
Initially, self-hosting appealed to me because it offered complete control over my digital infrastructure. Running my own server meant I could maintain a centralized environment for multiple services: a personal git repository, a Docker container repository, game servers, and various websites. This integrated approach aligned with my desire for full control over my digital presence.
However, the self-hosting setup revealed some significant challenges. The most pressing issue stemmed from my Internet Service Provider’s dynamic IP allocation system. Whenever network traffic rose above a certain threshold, my ISP would assign a new IP address to my connection. To solve this I used a Dynamic DNS client for Cloudflare that runs every six minutes to update the IP address, this solution proved insufficient to maintain consistent accessibility to my blog.
Transitioning to GitHub Pages
To address these challenges, I decided to migrate to GitHub Pages, which required restructuring my repository organization. I created two separate repositories:
digital-garden: This repository contains my Obsidian vault, housing all my notes and contentquartz: This repository maintains my Quartz configuration settings
The digital-garden repository serves as the source for GitHub Pages. Any changes pushed to this repository trigger an automatic rebuild of the site, ensuring content stays current.
Setting Up GitHub Pages
To enable GitHub Pages for your repository, follow these steps:
- Navigate to your repository’s Settings
- Select the Pages section
- Enable GitHub Pages
- Change the source to GitHub Actions for CI/CD pipeline integration
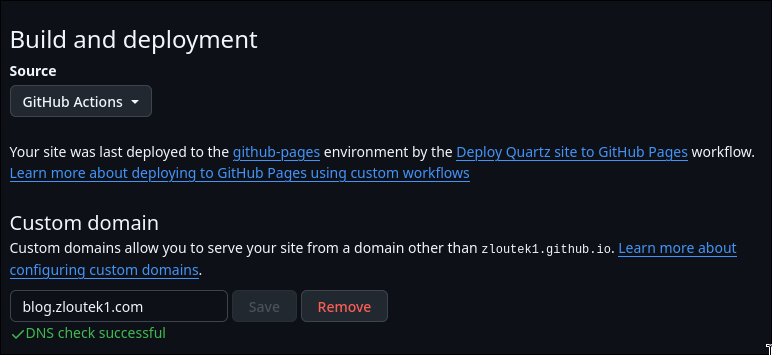
- Optionally, configure a custom domain for your site
Implementing the CI/CD Pipeline
The continuous integration pipeline automates the deployment process. Create a new file at .github/workflows/ci.yaml with the deployment configuration. This workflow accomplishes several key tasks:
- Clones both the Quartz configuration and digital garden content repositories
- Sets up the Node.js environment
- Installs dependencies and builds the static site
- Deploys the built site to GitHub Pages
name: Deploy Quartz site to GitHub Pages

on:
  push:
    branches:
      - main
  workflow_dispatch:

permissions:
  contents: read
  pages: write
  id-token: write

concurrency:
  group: "pages"
  cancel-in-progress: false

jobs:
  build:
    runs-on: ubuntu-22.04
    steps:
      - name: Checkout Quartz
        uses: actions/checkout@v4
        with:
          repository: zloutek1/quartz

      - name: Checkout digital garden content
        uses: actions/checkout@v4
        with:
          path: content

      - uses: actions/setup-node@v4
        with:
          node-version: 22

      - name: Install Dependencies
        run: npm ci

      - name: Build Quartz
        run: npx quartz build

      - name: Upload artifact
        uses: actions/upload-pages-artifact@v3
        with:
          path: public

  deploy:
    needs: build
    environment:
      name: github-pages
      url: ${{ steps.deployment.outputs.page_url }}

    runs-on: ubuntu-latest
    steps:
      - name: Deploy to GitHub Pages
        id: deployment
        uses: actions/deploy-pages@v4
Domain Configuration with Cloudflare
For my setup, I needed to manage two domains pointing to the blog: blog.zloutek1.com and blog.epicartificials.com. The configuration process differed for each domain:
For blog.zloutek1.com, I simply:
- Added the domain as a custom domain in GitHub Pages
- Created a CNAME record in Cloudflare pointing to my GitHub Pages site

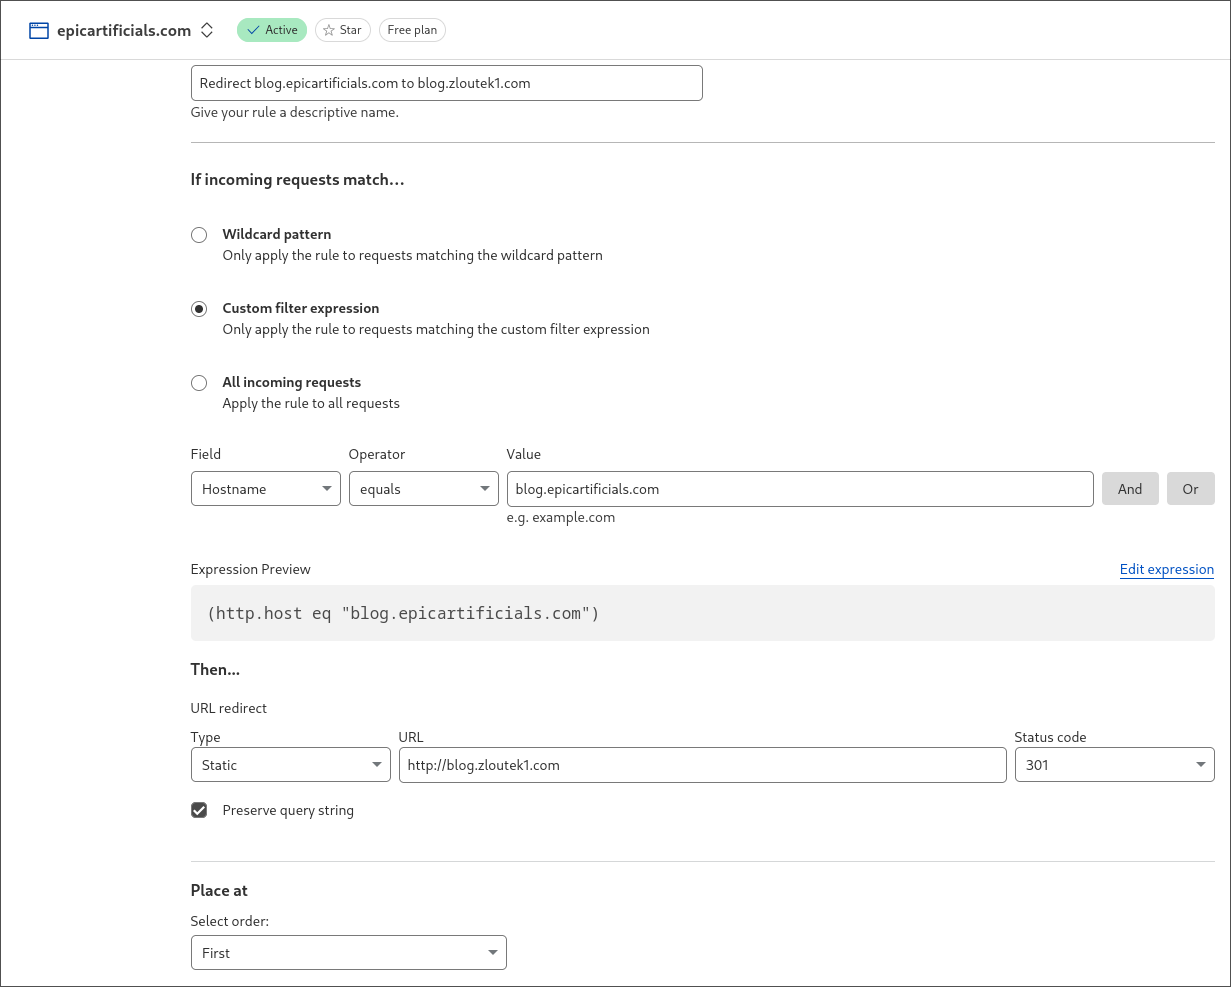
For blog.epicartificials.com, additional configuration was necessary:
- Created a URL redirect rule in Cloudflare (Rules > Overview > Redirect to a New URL)
- Set up the rule to automatically redirect traffic from
blog.epicartificials.comtoblog.zloutek1.com
This migration has significantly improved my blog’s reliability by eliminating the challenges associated with dynamic IP addresses while maintaining the flexibility and ease of use of my existing Obsidian-based workflow. The automated deployment process through GitHub Actions ensures that my content updates are seamlessly published, making the entire system more maintainable and robust.